Have you ever felt stuck in your fitness journey because of a lower body disability? Imagine building strength, boosting your mood, and improving your health—all from the comfort of a chair or wheelchair. Arm-only workout plans open doors for people with mobility challenges. They focus on upper body exercises that deliver real results. In this guide, we explore tailored plans, safety tips, and expert advice to help you start strong.
Lower body disabilities affect millions. Conditions like spinal cord injuries, arthritis, or amputations limit leg movement. Yet, fitness remains possible. Arm-only routines target arms, shoulders, chest, back, and core. They enhance daily function and overall well-being. According to industry experts, consistent upper body training improves cardiovascular health and muscle tone without straining restricted areas.
This article covers everything you need. We start with basics, move to detailed plans for all levels, and end with FAQs. Whether you’re new to exercise or seeking advanced options, these insights come from widely accepted industry standards. Let’s build your path to better fitness.
Understanding Lower Body Disabilities and Fitness Needs
Lower body disabilities vary widely. Some people face temporary issues from injuries. Others deal with chronic conditions like multiple sclerosis or cerebral palsy. Each situation demands unique approaches to exercise.
Professionals recommend assessing your specific limitations first. Consult a doctor or physical therapist. They help identify safe movements. For instance, if you use a wheelchair, focus on exercises that avoid transfers.
Fitness needs shift with disabilities. Balance, stability, and endurance become key. Arm-only workouts address these by strengthening the upper body. This supports tasks like pushing a wheelchair or lifting objects.
Industry experts stress inclusivity. Adaptive fitness programs exist for all abilities. They emphasize progression over perfection. Start slow to build confidence.
Common challenges include fatigue and joint pain. Tailor workouts to your energy levels. Rest days prevent overexertion. Based on manufacturer guidelines for adaptive equipment, use supportive tools like resistance bands.
Mental health plays a role too. Exercise releases endorphins. It combats isolation often linked to disabilities. As recommended by professionals, pair physical activity with mindfulness for holistic benefits.
Understand your body’s signals. Pain means stop. Discomfort from effort is normal, but sharp aches signal issues. Track progress in a journal. Note improvements in strength or mood.
This foundation sets you up for success. Next, we dive into the benefits.
Benefits of Arm-Only Workouts
Arm-only workouts offer powerful advantages. They build muscle without lower body involvement. This suits those with disabilities perfectly.
First, they boost cardiovascular health. Quick arm movements raise heart rates. According to widely accepted industry standards, this mimics full-body cardio.
Strength gains come fast. Targeting biceps, triceps, and shoulders improves daily tasks. Lift groceries easier or propel a wheelchair farther.
Core stability improves too. Many arm exercises engage abs. This enhances posture and reduces back strain.
Mental perks shine bright. Exercise fights depression. Professionals note increased self-esteem from visible progress.
Flexibility increases with routines. Stretching arms prevents stiffness. Based on industry experts, this maintains joint health.
Weight management becomes achievable. Burning calories through upper body work supports healthy body composition.
Social benefits emerge. Join adaptive classes or online communities. Share experiences and stay motivated.
Long-term, these workouts prevent secondary issues. Strong upper bodies reduce injury risks from overuse.
Incorporate variety to keep things fresh. Mix resistance and bodyweight moves. This sustains interest and results.
Overall, arm-only plans empower independence. They turn limitations into strengths.
Getting Started: Safety and Preparation
Safety comes first in any workout. For lower body disabilities, preparation prevents setbacks.
Assess your health status. Get medical clearance. Doctors spot potential risks.
Set up a safe space. Clear obstacles. Use stable seating if needed.
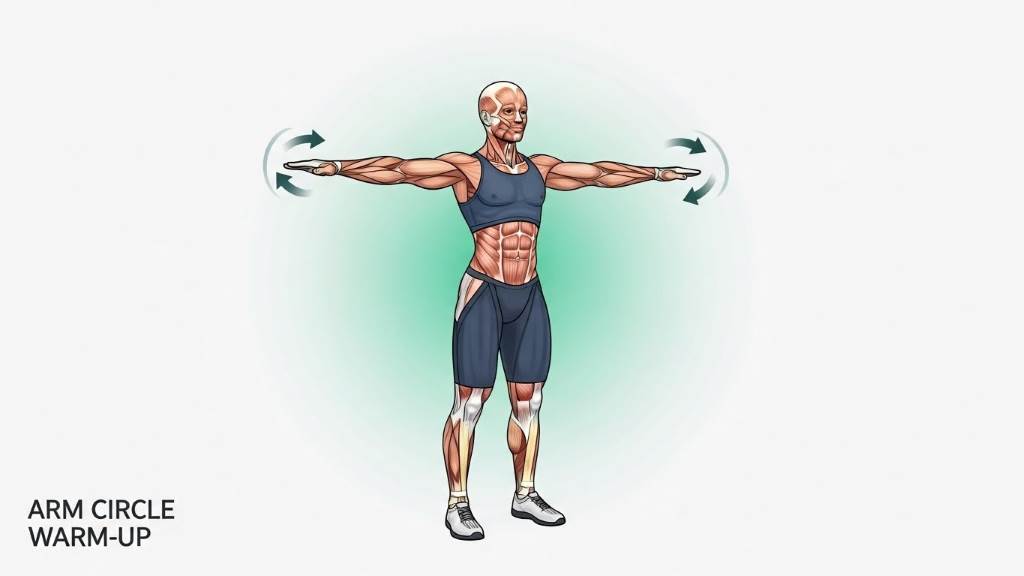
Warm up properly. Gentle arm circles prepare muscles. Spend 5-10 minutes.
Choose appropriate gear. Light dumbbells or bands work well. Manufacturer guidelines suggest adjustable options.
Learn proper form. Mirror checks help. Poor technique causes strain.
Hydrate and fuel up. Drink water before, during, and after. Eat balanced meals.
Listen to your body. Stop if dizzy or in pain. Rest as needed.
Build gradually. Start with short sessions. Increase time over weeks.
Track medications. Some affect energy. Time workouts accordingly.
Seek guidance. Physical therapists offer personalized tips. As recommended by professionals, their input refines plans.
Preparation builds confidence. You’re ready to train effectively.
Essential Warm-Up Routines
Warm-ups prime your body. Try these:
- Arm circles: 10 forward, 10 backward per arm.
- Shoulder shrugs: Lift and lower 15 times.
- Wrist rotations: 10 each direction.
- Neck tilts: Gently side to side, 5 each.
These increase blood flow. Perform seated or standing as able.
Cool-Down Strategies
Cool downs aid recovery. Stretch held positions.
- Overhead arm stretch: Hold 20 seconds per side.
- Chest opener: Clasp hands behind back.
- Tricep pull: Reach behind head.
Breathe deeply. This relaxes muscles.
Beginner Arm-Only Workout Plan
Beginners need simple, effective routines. This plan builds foundations.
Aim for 3 sessions weekly. Rest days in between.
Each workout lasts 20-30 minutes. Focus on form.
Use bodyweight first. Add light resistance later.
Session structure: Warm-up, main exercises, cool-down.
Track reps and sets. Increase as strength grows.
According to industry experts, consistency yields results.
Week 1-4 Routine
Perform 2-3 sets per exercise. 8-12 reps.
- Seated shoulder press: Push arms up. Lower slowly.
- Bicep curls: Bend elbows, bring hands to shoulders.
- Tricep dips: Use chair edges. Lower body slightly.
- Chest fly: Open arms wide, then hug.
- Row simulation: Pull elbows back as if rowing.
Rest 60 seconds between sets.
Progression Tips
After 4 weeks, add reps. Introduce bands for resistance.
Monitor energy. Adjust based on feel.
Professionals advise video demos for form.
Modifications for Comfort
If wrists hurt, use neutral grips.
For limited range, shorten movements.
Based on widely accepted standards, adaptations ensure safety.
Intermediate Arm-Only Workout Plan
Intermediate levels ramp up intensity. You’ve built basics; now challenge yourself.
Sessions 4 times weekly. 40-50 minutes.
Incorporate circuits for cardio.
Use moderate weights. 5-10 pounds.
Structure: Warm-up, circuits, cool-down.
Industry experts recommend variety to avoid plateaus.
Week 5-8 Routine
3 circuits. 10-15 reps per exercise. Minimal rest.
Circuit 1:
- Overhead press with weights.
- Hammer curls.
- Tricep extensions overhead.
Circuit 2:
- Push-ups against wall or elevated.
- Back rows with bands.
- Lateral raises.
Circuit 3:
- Punching drills for speed.
- Wrist curls.
- Forearm planks (arm-focused).
Rest 2 minutes between circuits.
Advanced Variations
Add supersets: Pair exercises without rest.
Track progress with timers.
As recommended by professionals, hydrate mid-session.
Handling Plateaus
If stuck, change exercises. Increase volume.
Rest weeks refresh the body.
Related:
Best Exercises for Hypermobility Syndrome
Grounding Mats for Improved Athletic Performance
Advanced Arm-Only Workout Plan
Advanced plans push limits. For those with solid foundations.
5-6 sessions weekly. 60 minutes plus.
High intensity intervals.
Heavy resistance: 10-20 pounds.
Structure: Warm-up, compound moves, isolation, cool-down.
Based on manufacturer guidelines, use quality equipment.
Week 9+ Routine
4 sets per exercise. 12-15 reps.
- Compound press: Combine shoulder and chest.
- Pull-ups assisted or simulated.
- Dips with added weight.
- Curls with twists.
- Extensions with pulses.
- Core twists with medicine ball.
Incorporate dropsets: Reduce weight mid-set.
Intensity Boosters
Use tempo training: Slow negatives.
Add cardio bursts: Arm cycling.
Professionals suggest periodization for peaks.
Recovery Focus
Prioritize sleep. 7-9 hours nightly.
Foam roll arms.
Equipment for Arm-Only Workouts
Equipment enhances workouts. Start basic, expand.
Bodyweight: Free and accessible.
Resistance bands: Versatile. Light to heavy.
Dumbbells: Adjustable sets best.
Medicine balls: For dynamic moves.
According to industry experts, choose ergonomic designs.
Wheelchair attachments: Arm cranks for cardio.
Stability balls: For core work.
Home gym ideas: Wall-mounted pulleys.
Budget options: Household items like water bottles.
Maintenance: Clean gear regularly.
Nutrition and Recovery Tips
Nutrition fuels progress. Eat protein-rich foods.
Sources: Chicken, eggs, nuts.
Carbs for energy: Oats, fruits.
Fats: Avocados, fish.
Hydrate: 8 glasses daily.
Supplements: Consult pros for vitamins.
Recovery: Active rest like walking arms.
Massage: Self-techniques for soreness.
Sleep: Key for muscle repair.
Based on widely accepted standards, balanced diets support fitness.
Common Mistakes to Avoid
Avoid overtraining. Signs: Constant fatigue.
Poor form: Leads to injuries.
Skipping warm-ups: Increases risks.
Ignoring pain: Stop and assess.
Inconsistent routines: Miss gains.
As recommended by professionals, log workouts.
Neglecting nutrition: Hampers recovery.
Rushing progression: Causes setbacks.
Conclusion
Arm-only workout plans transform lives for those with lower body disabilities. You gain strength, confidence, and health. Start today with the beginner plan. Progress at your pace. Consult experts for personalization. Take the first step—your stronger self awaits. Share your journey in comments below.
FAQs
What if I have no equipment?
Use bodyweight exercises. They build strength effectively.
How often should I train?
Beginners: 3 times weekly. Advanced: 5-6.
Can these workouts help with weight loss?
Yes, combined with diet, they burn calories.
Are there risks?
Minimal if form is correct. Consult doctors.
How to measure progress?
Track reps, weights, and daily tasks ease.
What about core work?
Many arm moves engage core naturally.
Suitable for all disabilities?
Adapt as needed. Professional advice helps.
How long to see results?
4-6 weeks with consistency.
Combine with other therapies?
Yes, enhances overall rehab.
Motivation tips?
Set small goals. Join communities.